|
My Eyebuilt project (I built it)
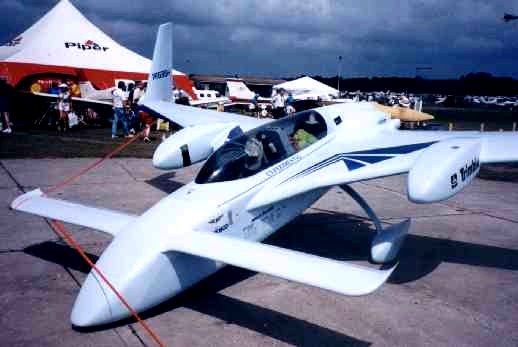
The goal!
Links to canard info sites:
Disclaimer: The following pages of my project are in no way a guide or instruction manual to be used to construct an airplane or any project resembling such. This is only a documentation of my plane and the way I decide to construct it to suit me. If you decide to build a plane, refer to and follow your specific plans and instructions as required.
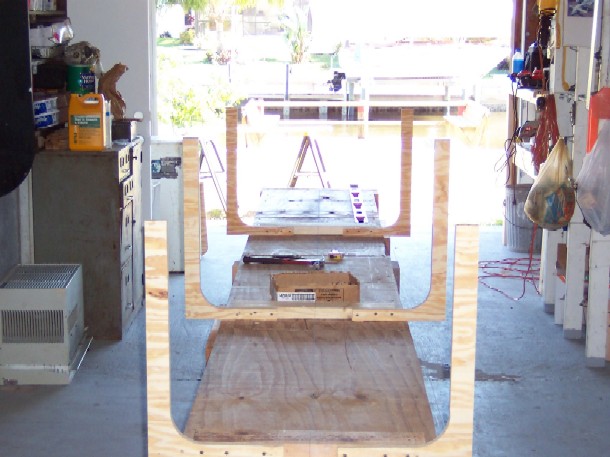
I decided to build this project after many frustrating hours with airline delays and missed flights. The final straw was the last time I flew back from Costa Rica. I had a 7 am check in time which meant I had to be there at 5 am. The flight was to board at 8 am and depart at 8:30. I sat in the airport and didn't get on the plane until 2 pm that afternoon and just made a connection to get to the local airport here and finally got to my front door at 10:30 pm that night. Talk about a long day. All this for a 2 hour flight and a 30 minute connection! That's when I decided to build my plane if it was the last thing I did!!! With gas prices and general up keep it wont be much if any cheaper than a plane ticket, but the freedom will be priceless! I decided on a Long EZ / Berkut style and set the wheels in motion and have been going at it ever since. Below you will find my ideas and progress as I plod along andI am using the Terf CD along with the canard forums as needed for information to do each step. It will be powered by a Mazda 13B supercharged for normalization. I feel at this point that this is better combination than all the issues with a turbo. Time will tell as progress is made from the turbo owners. Zoom Zoom Zoom!!!!!!!!!!!!! Start date of build---------------3/25/06 The jig table was mainly built out of good used materials from construction site dumpsters except for the lattice for the foam attachment points and the plywood for the vertical ribs.
The floor levelers were a great time saver and I found that the wood moves with the humidity here so its easy to keep the table level as I go along.
Total hours for jig was 4 and the fuselage form building was 14.
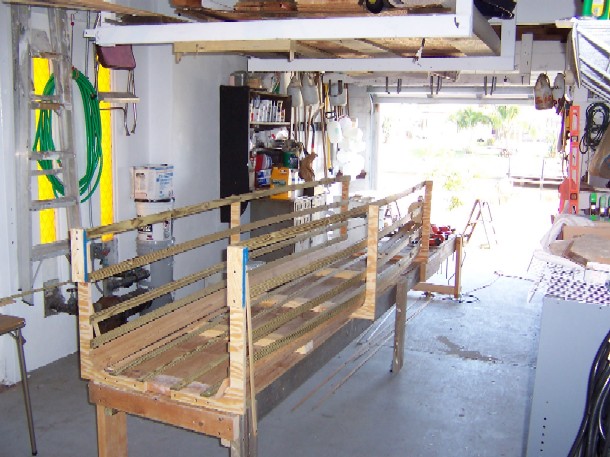
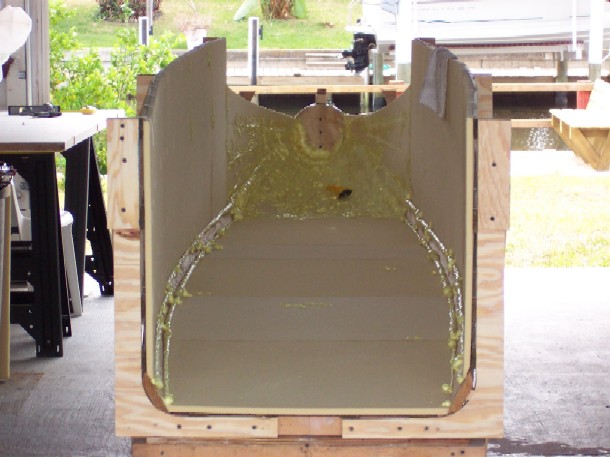
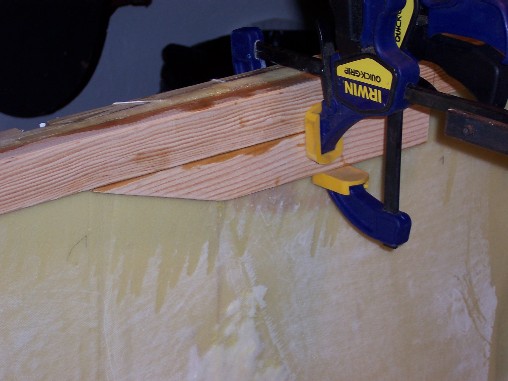
Fuselage was stretched 6” in the back seat area and 12” from f22 forward. The nose will be a rounded ball shape ala Bill James! Bill has a great site about his plane with all of the innovations he has tried and documented! I plan to use some of his "thoughts" on my project. Check it out @
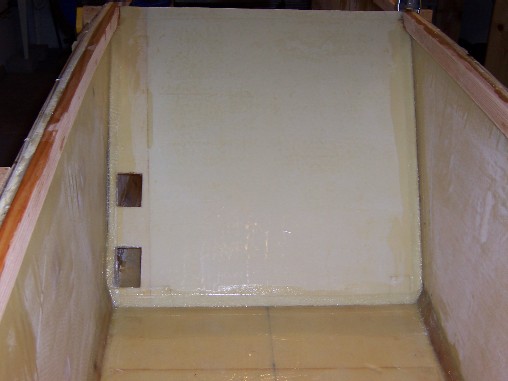
Once the new foam was fitted to the inside of the form, the bulkheads will be custom fitted and then located in the new fuselage. The inside of the fuselage can now be hard shelled and then the two ply lay up followed by the top longerons. Then the bulkheads and seats can then be fitted and glassed in place. Then its time to install seat bottoms, consoles, lines, wires, controls, heater, and sump tank under the back seat. This will be a large sump tank as the landing gear will no longer be in this location. I will be fabricating my own retracts. I am going to try to finish everything I can inside the tub while it is accessible before the strakes, canopy and spar are installed.
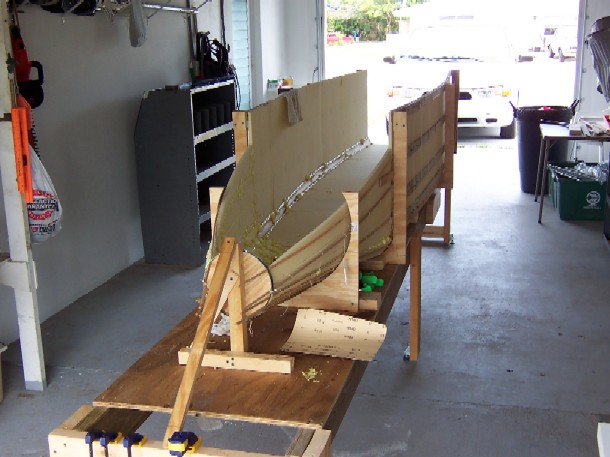
4/10/06 The foam and bottom half of the nose are all formed. I made a mistake by using Great Stuff for filler in the nose. It is very rubbery and hard to sand. Once I get the excess cut, sanded and straighten out, I will micro it and make it right. Once the fuselage is out of the jig, I will flip it over and add a second layer of foam to the outside and then glass it.
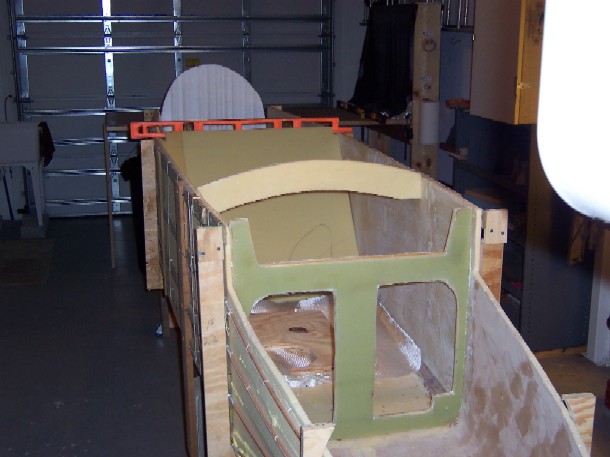
4/16/06 The bulkheads are cut out and pre fitted to the inside of the fuse. Once the inside is laid up I can finish custom fitting them in place and lay them in. Pretty much stock placement with the exception of 6” added between front and back seat and the top half of the instrument panel will be tilted forward 7 degrees and be removable for servicing. I may change this later to a more appealing and serviceable panel. For now it will not be installed.
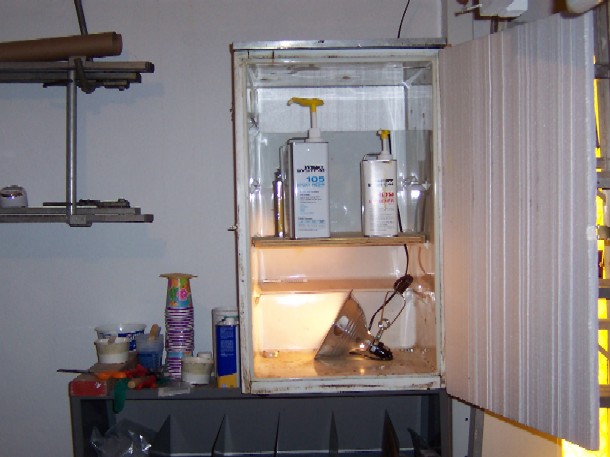
This is my "El Cheapo" hot box. I found this old apartment refrigerator for free with no door and used a piece of 1" foam that was part of the first foam shipment I got for the new door. There where two Styrofoam pieces on each side of the box used to protect the lastafoam in the box. I even used the cardboard boxes to lay out the templates for the bulkheads. Next I got 2 hinges and a hasp and 5 min epoxied them to the foam and metal screwed the rest to the metal box. Then I got a work light, ran the cord out the back, sealed the 10 x 18 opening in the back with another piece of scrap foam and cut a piece of scrap plywood for a shelf. Total cost was about $14.00! I started out with a 100 watt bulb and it went to 120 degrees, so I now have a 60 watt and it keeps it at 105. Gotta love it!!
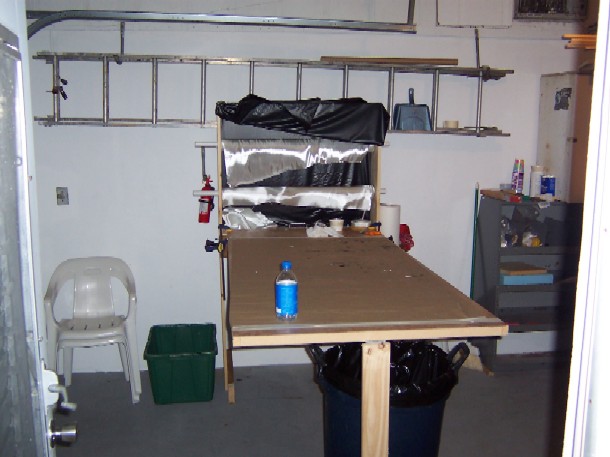
This is the cloth table I came up with. I started off with some 2x8x1 pine boards and cut them to the lengths I wanted. Then I drilled the holes for the fabric roll SCH. 40 pvc 1" tubes to pass through. Screwed it all together with some drywall screws and stapled some 4 mil plastic solid on the backside and only across the top in the front so it works like a curtain when I'm not using it to keep the dirt out. I cut 2 2x6 x 24" for the bottom feet for it to stand on. Most of the scraps store in the bottom and I keep them in old plastic grocery bags to help keep them clean also. One for BID and one for UNI. For the table, I bought a 36" x 6' 8" luan door slab and mounted a hinged leg in the center on one end and mounted 2 L brackets on the fabric roll frame. The other end of the door C clamps to these brackets. I can now fold up the door to get it out of the way when not in use. Also I put 2 coats of urethane on the top of the door to make it easy to wipe clean and I use contractors building paper to cover the top to keep the epoxy off. After a layup, I just peel it off and pitch it and put down a fresh piece. Easy! Total cost was about $40.00!
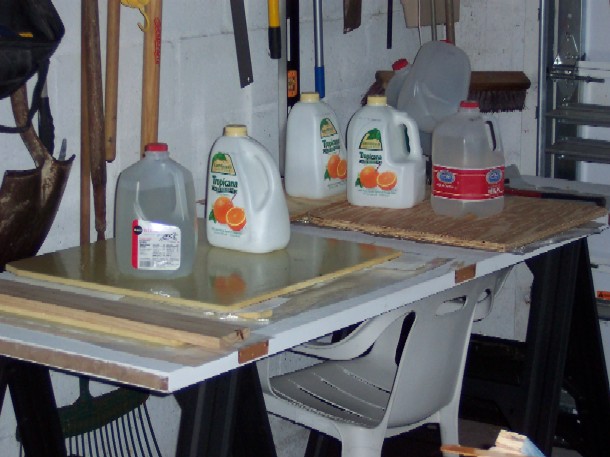
This is some of the bulkheads in cure on my second table which is a used dumpster find luan door on saw horses. Easy to put up and out of the way in a small work space. The jugs sitting on top of the bulkheads are full of water for weight. I lay the part flat on the table and a piece of plywood on top the peel ply and then the jugs. These are used jugs that were going to be tossed out so I cleaned them out and filled them with water and the net is around 9 pounds each. I keep about 12 of them. They store well and you can move them easily with the built in handles and they cost nothing to make. The layup in the front is using a bulkhead that is already done to keep the layup under it flat. The parts came out OK for my first layups. Maybe a little heavy on the epoxy but I'm happy so far.
Update: 7/29/06 More work done this week. I'm trying to get all I can done before I start my new job!
I built this site with all the tools from Solo Build It. Click on the Site Sell Target below to see how you can too!
|