|
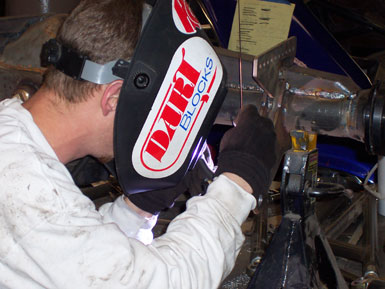
MIG-welding!
To begin your mig-welding you need to have the proper equipment and everything is properly connected and set. Attach the ground lead to the metal and as you begin welding, and keep a 1/4 3/8 in gap between the metal and the stinger tip. (This is the electrode that is extending from the tip of the contact tube.) Two mig-welding methods can be used. First is the drawing of an oval as you did in school. As you start your pass, you move the stinger in a circular motion and adjust your speed so the weld flows out and penetrates the metals to be joined and a back an forth movement will also pool well. For thin metals, use a smaller diameter wire. For thicker metal use a larger wire and a larger machine. Use the correct wire type for the base metal being mig-welded. Use stainless steel wires for mig-welding stainless steel, aluminum wires for mig-welding aluminum, and steel wires for steel. Shielding gas: Use the proper shielding gas for mig-welding. CO2 is good for penetrating welds on steel, but may be too hot for thin metal. Use 75% Argon/25% CO2 for thinner steels. Use only Argon for mig-welding aluminum. You can use a triple-mix for stainless steels (Helium + Argon + CO2). For steel, there are two common wire types. Use an AWS classification ER70S-3 for all purpose, economical welding. Use ER70S-6 wire when more deoxidizers are needed for mig-welding on dirty or rusty steel. For best control of your weld bead, keep the wire directed at the leading edge of the weld pool. When welding out of position (vertical, horizontal, or overhead mig-welding), keep the weld pool small for best weld bead control, and use the smallest wire diameter size you can. Be sure to match your contact tube, gun liner, and drive rolls to the wire size you are using. Clean the gun liner and drive rolls occasionally, and keep the gun nozzle clean of spatter. Replace the contact tip if blocked or feeding poorly. Nozzle spray will help make tip cleaning easier and trim the end of the wire before each pass as this will make a better weld and starting easier. Keep the mig-welding gun straight as possible when welding, to avoid poor wire feeding and use both hands to steady the gun when you weld. Do this whenever possible. (This also applies to Stick and TIG welding, and plasma cutting.) Keep the wire feeder hub tension and drive roll pressure on your mig-welder just tight enough to feed wire, but don't over tighten and store new wire in a clean, dry place when not welding, to avoid picking up contaminants that lead to poor welds. Use DCEP (reverse polarity) on the power source. A drag or pull gun technique will give you a bit more penetration and a narrower bead. A push gun technique will give you a bit less penetration, and a wider bead. Aluminum MIG-Welding: The best feeding of wire for aluminum is done with a spool gun. If you can't use a spool gun, use the shortest gun possible and keep the gun as straight as possible. Use Argon only for shielding gas. Only use a push gun technique when welding aluminum. If you are having feeding problems, one thing you can try is a contact tip that is one size bigger than your wire. The most common wire type is ER4043 for all-purpose work. ER5356 is a stiffer wire (easier to feed), and is used when more rigid, higher-strength weld properties are needed. Clean the aluminum parts before welding, to remove the oxide layer. Use a stainless steel wire brush used only for cleaning aluminum. Fill the crater at the end of the weld to avoid a crack. One way to do this is to dwell in the weld pool for a second at the end of the weld. Self-Shielded Flux Cored Welding: Use a drag (pull) gun technique. Keep the wire clean and dry for best weld results. The weld is similar to stick welding, in that a layer of slag must be removed from the weld after welding. Use a chipping hammer and a wire brush. Self-shielded Flux Cored does not need shielding from an external cylinder of shielding gas. (The shielding is in the wire.) This makes it good for outside work, where external shielding gas could be blown away. Self-shielded Flux Cored is generally harder to accomplish on thin metals than MIG welding. TIG Welding: Good process for thin metal ‹ very clean process producing good looking welds. Use Argon shielding for steel, stainless, and aluminum. Use DC-Straight Polarity (DCEN) for steel and stainless. Use AC for aluminum and always use a push technique with the TIG torch. Match the tungsten electrode size with the collet size. Aluminum ‹ use pure tungsten, AWS Class EWP (green identifying band). This will form a balled-end in AC. Steel and stainless steel ‹ use 2% thoriated tungsten, AWS Class EWTH-2 (red identifying band). Prepare a pointed-end for DCEN welding. Stick Welding: Use a drag technique for most applications and take precautions with flying materials when chipping slag. Keep electrodes clean and dry ‹ follow manufacturers recommendations. Common steel electrodes are penetration: DCEN ‹ Least penetration, AC ‹ medium (can be more spatter also), DCEP ‹ most penetration. Plasma Cutting: Clean, dry, oil-free air is important and stay at recommended air pressure (more air is not necessarily better!) Touch torch tip gently to the work piece. When initiating a cut, start on the end of material to be cut and ensure arc has completely penetrated metal before proceeding further. When completing cut, pause at the end to assure severance. The torch should be perpendicular to work piece and the work cable should be attached as close to work piece cut as possible. If you can see the arc coming through the bottom of the cut metal, it will eliminate guessing if your travel speed is correct. Resistance Welding: Resistance welding is not recommended for aluminum, copper, or copper alloys and is for use on steel and stainless steel only. For more heat (amperage output), use shorter tongs. For units without a heat control, tong length can be used for a control. For instance, for thin metals where you want less heat, longer tongs can be used. Keep in mind that longer tongs can bend, and you may lose pressure at the weld. For the metals being welded, make sure there is no gap between the pieces as this will weaken the weld. Keep the alignment of the tongs straight, so that the tips touch each other exactly. Also, maintain a proper pressure adjustment, not too much or too little. When you need one side of the weld to have good appearance, you can flatten (machine) the tip somewhat on that side. Clean the tips on a regular basis or you will lose output (amperage). Dress the tips with a proper tip dresser.
Go to Mig-welding / surfaceplate!
For more welding information, visit our friends @
I built this site with all the tools from Solo Build It. Click on the Site Sell Target below to see how you can too!
Webmaster!
|